前言
最近微软发布了一个新终端 Windows termianl ,于是就从 Xshell 转了过去,但因为此终端现在仍处于预览版的状态, bug 难免,特别是 Tmux 的渲染方面,非常糟糕。 Xshell 这方面做得更好,但是 Xshell 就有点偏丑,不够轻,并且对于非学生来说是付费的,所以就开始了终端的折腾之路。确切来说是 ssh 客户端。
先后试过:
- putty > 很轻,很强,但是不够好用,不能多单窗口,多标签页,不够颜值。
- Fluent termianl > 一款颜值很高的终端,基于 UWP ,能和 Windows 10 风格完美融合,也有 UWP 应用的固有优势:速度快。多标签页支持,快捷键打开特定 shell
- Git bash 自带终端 > tmux 渲染也是有问题,并且也不太好看。
- powershell > Windows 自己的终端(或者叫 shell ?) , tmux 渲染有问题,没有 git bash 内嵌的 vim 等工具。
- Cmder > 我使用时间不长,不做评价,但是我不大喜欢。
后来找到了一个解决方案,来自 V2 #11 的老哥
主要讨论终端的表现,用过 cmd、mintty(msys2, wsltty), ConEmu(cmder), alacritty,启动速度都很快,但各有各的 bug。 常用的有: * mintty(wsltty)+wslbridge+Alpine WSL:主力 ssh/mosh 用的终端,tmux 渲染正常、powerline 字体正常、Per-monitor DPI aware 正常的终端,可能需要自行编译 wslbridge-backend。 * cmd/powershell:Windows 环境下,运行一些简单的命令,高频使用。 偶尔用的 /曾经用过:
> mintty+msys2:偶尔运行 mingw 环境。
> putty:很稳的 ssh 终端,但不支持 mosh,故改用 mintty。
> cmder:曾 ssh/mosh 用的终端,powerline 字体需要每个窗口手工调整,tmux 渲染偶尔底部异常(可能我设置问题)。
> alacritty:目前 Windows 下字体的 bug 略多,观望中。( Linux 下除 DPI 外的表现很好,主力终端。)
Linux zsh 无疑是最强大的 shell ,我目前的矛盾是常见终端无法正常渲染 tmux 多窗口,而mintty,基于PuTTY的终端仿真和Windows前端部分,但是以多种方式对其进行了改进,特别是在xterm兼容性方面,而 wsltty 是为 wsl (windows subsystem of Linux)我是驴定制的终端,和 wsl 是通过 tcp 链接....
有一点像 ssh 的方式, shell 来自 wsl ,终端"ssh" wsl. 当然 wsl 里面你选择什么 shell 就随意很多了, zsh 配置也足够简单。
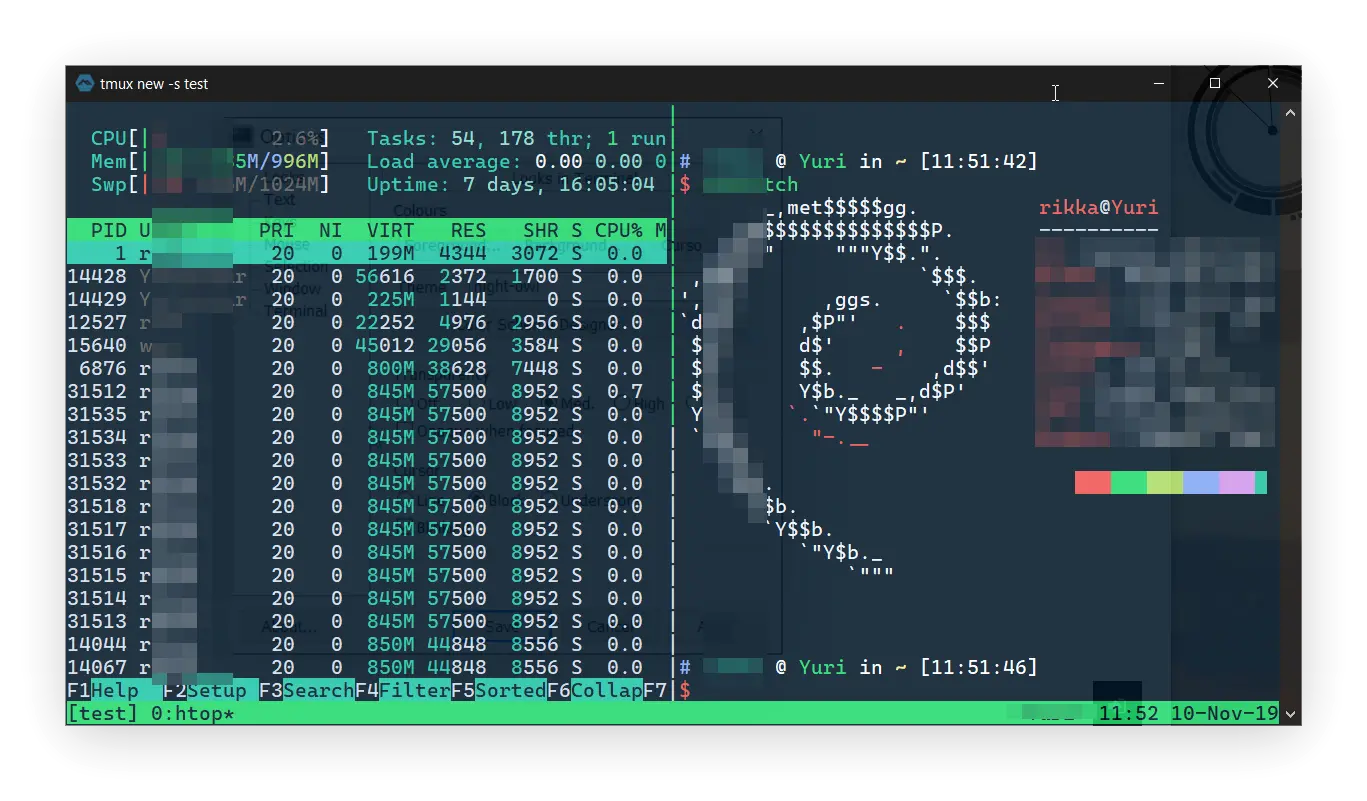
有皮肤、颜值高、渲染不出错、启动速度快(决定于wsl的启动速度),缺点没有多 tab 支持,以及 windows 下的操作 还是得配套其他终端,这里就用 Windows terminal + git bash !
wsltty 主要有两个部分,一是前端,而是安装于 wsl 里面的 后端支持 wslbridge-backend
安装
建议用 chocolatey 软件包管理器安装,快速、高效、干净。
安装 choco
检查脚本运行权限
以管理员模式打开 powershell (左下田字表右键)Get-ExecutionPolicy检查输出内容
若为 strict
运行以下代码,更改策略run Set-ExecutionPolicy AllSigned ## 或者 Set-ExecutionPolicy Bypass -Scope Process.一路 y 即可
目的就是更改策略,赋予执行脚本的权限
执行以下代码安装 choco
Set-ExecutionPolicy Bypass -Scope Process -Force; iex ((New-Object System.Net.WebClient).DownloadString('https://chocolatey.org/install.ps1'))等待安装完成
更多相关内容可以查阅About Execution Policies
安装 wsltty 和 WSL
安装 mintty 和 backend-bridge
仍然在管理员模式下的 powershell
choco install wsltty会自动安装两个部分
2.安装 wsl
仍然在管理员模式下的 powershell
开启 wsl 支持,等待完成后重启电脑
Enable-WindowsOptionalFeature -Online -FeatureName Microsoft-Windows-Subsystem-Linux
choco install wsl-alpine按提示操作,等待完成。
- 配置
安装完成后,在开始菜单里面找到 configure WSL shortcuts ,点击自动配置 wsltty 。
关于自动生成的几个快捷方式
In the Start Menu, the following shortcuts are installed: Shortcut WSL Terminal to start the default WSL distribution (as configured with the >Windows tool wslconfig) For each installed WSL distribution, for example Ubuntu, a shortcut like Ubuntu Terminal to start in the WSL user home
In the Start Menu subfolder WSLtty, the following additional shortcuts are installed:
Shortcut WSL Terminal % to start the default WSL distribution in the Windows %USERPROFILE% home Terminal % to start in the Windows %USERPROFILE% home One Desktop shortcut is installed:
Shortcut WSL Terminal to start the default WSL distribution (as configured with the >Windows tool wslconfig)
Other, distribution-specific shortcuts can be copied to the desktop from the Start >Menu if desired. The Start menu folder WSLtty contains the link configure WSL shortcuts. This >function is initially run when wsltty is installed. If should be rerun after adding
or removing WSL distributions, in order to create the respective set of shortcuts in >the Start menu.
即带 % 打开默认的wsl 发行版,不带的则是对应的发行版,高级配置参考 Github README
自定义和美化
- 主题
https://dainty.site/wsltty 这是大佬做好的主题,毛玻璃透明,需要自己用 yarn 构建。
构建指导
git clone
https://github.com/alexanderte/dainty-wsltty
cd ./dainty-wsltty
npm install yarn -g
yarn
####
yarn build -p {theme_name}
C:\Users\userName\AppData\Local\wsltty\usr\share\mintty\themes>C:\Users\userName\AppData\Local\wsltty\usr\share\mintty\themes
即可,然后在 wsltty 终端上选择主题就可以了。
我这里构建了几个主题,next-cloud-share-link 密码:bwoywan268
下载后复制到 C:\Users\YourUserName\AppData\Local\wsltty\usr\share\mintty\themes
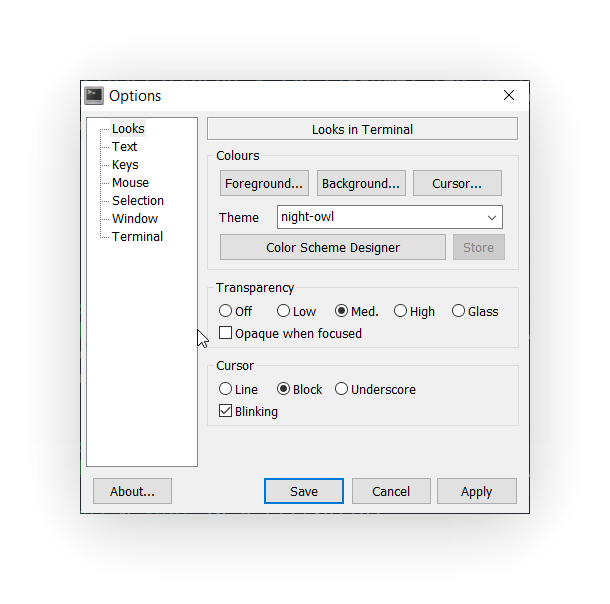
在窗口左上角右键菜单里面 选项-主题 里面配置好即可。
我比较喜欢的主题是 night-owl
其他背景、透明度、字体大小建议按照自己的喜好配置 
环境配置
- 软件包
alpine 是一个十分精简的发行版,镜像只有几 MB ,自带的软件包管理器是 apk, 键入 apk --help 查看帮助
- 用户
第一次进入新建用户如果遇到 root 密码问题,可以在管理员模式下的 powershell 执行以下命令,更改 root 密码,建议用常规用户日常使用,使用 sudo 调用 root 权限。相关配置可以看看sudo 配置
wsl.exe --distribution Alpine --user root安装 ssh
sudo apk add openssh到这里基本就结束了,打开速度还是很快的。缺陷,就是一切都限制于 wsl 内,虽然 wsl 里面有映射主机目录。